
“My Roomba displays Error 8. What does it mean?”
Well, such error can indicate a few issues.
It might sound time-consuming to fix.
But let me tell you something…
Fixing Roomba Error 8 requires little to no effort at all!
Read on to discover:
- When to replace a vacuum filter or dustbin.
- 10 steps to fix “Roomba Error 8” in seconds.
- How to remove the filter from a Roomba unit.
- Whether you can clean a Roomba filter with water.
- And much much more…
Why does my Roomba display error 8?
Your Roomba displays Error 8 because the vacuum has poor suction. A vacuum can have poor suction when the filter becomes clogged with dirt, dust, gunk, allergens, and debris. Or when the vacuum motor fails to turn properly. Basically, Roomba Error 8 happens due to insufficient airflow in the vacuum.
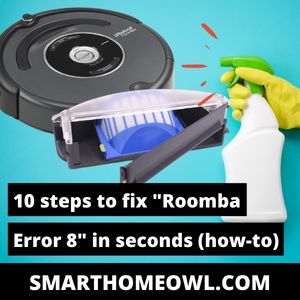
10 steps to fix “Roomba error 8”
#1: Press the bin release tab
Roomba Error 18 happens when the vacuum starts having poor suction.
And the main reason for poor suction or insufficient airflow is a clogged filter.
A vacuum works by sucking dirt to the vacuum entrance and releasing air from the exhaust.
After the exhaust, that’s where the filter is usually located.
It’s positioned at this specific location to further trap tiny dust and allergens. Preventing them from returning to the air.
That said, when you encounter Error 18 in your device, clean your Roomba filter.
To do that, you have to remove the dustbin from the Roomba unit.
“How can I remove the dustbin from the Roomba?”
First, you have to press the bin release tab.
Depending on the Roomba series you use, here’s where the bin release tab is located:
- For s series: at the middle-top surface of the Roomba unit.
- For e, i, and j series: at the side surface of the back of the Roomba unit.
- For 600, 700, 800, and series: at the top surface of the back of the Roomba unit.
Some Roomba models even have a bin () icon on it. So, you shouldn’t have a problem locating it.
Once you’ve located it, press it once. You should hear a “click” sound.
Doing this will allow you to remove the dustbin from the unit without force.
Reading tip: 27 Roomba Tips And Tricks To Keep Your House Clean
#2: Remove the bin from the unit
Next, remove the dustbin from the Roomba.
Different Roomba models have different dustbin access points.
Here’s how you can remove the dustbin based on the series you have:
- For s series: by pulling it upwards.
- For e, i, and j series: by pulling it sidewards.
- For 600, 700, 800, and 900 series: by pulling it sidewards.
The dustbin contains all the collected dirt, dust, allergens, and debris.
So, you have to be very careful when removing it from the unit. As you’d certainly not want to spill it on your floors.
Health tip: Use a pair of hand gloves to prevent your hands from getting dirty. Also, wear a face mask, especially if you have allergic rhinitis.
For more protection, ready a plastic bag before removing the dustbin from the Roomba. Then, use the plastic bag as a tool to avoid spillage.
Or better yet, move closer to a trash bin when doing this process.
That way, you won’t have to worry about dirt and dust falling off from the Roomba dustbin.
#3: Open the dustbin or filter door
For the 3rd step, you have to remove the filter from the dustbin.
If you’re using a Roomba from the e, i, and j series, skip this step. And proceed to step #4!
It’s because these specific Roomba series have their filters attached to the side of the bin.
However, continue reading this section if you’re using s, 600, 700, 800, and 900 Roomba series.
Some Roomba series have their filters inside the dustbin. While others have a separate compartment dedicated to the filter.
Here’s a quick guide on how to access your Roomba filter based on its series:
- For s, 800, and 900 series: open the filter door located at the top.
- For 600 and 700 series: open the dustbin door located on the right side.
Again, carefully open the dustbin or filter door to avoid spillage of dust and dirt.
Tip: Close electric fans or similar appliances around the area. To do this, avoid the fan from blowing off the dirt from the dustbin.
#4: Remove the filter from the bin
Once you’ve accessed the Roomba filter, remove it from the bin.
The shapes and sizes of Roomba filters differ depending on its series.
Here’s a quick guide for you to learn:
- 700 series: have 2 small rectangular-block filters.
- 600 series: have almost half-circle-shaped filters.
- s, 800, and 900 series: have rectangular-block filters.
- e, i, and j series: have smaller but chunkier rectangular-block filters.
You must determine what the filter on your Roomba looks like. Because you’ll use it as a guide in removing the filter from the bin.
Based on the Roomba series, here’s how to remove the filter from the dustbin:
- For 800 and 900 series: grab the yellow tab and pull it upwards.
- For 600 and 700 series: grab the sides of the filter and pull it forward.
- For s series: grab the tab at the middle of the filter and pull it upwards.
- For e, i, and j series: grab the top and bottom of the filter and slide it to the right.
Warning: Pulling the filter incorrectly can damage it. And cause your whole Roomba unit to malfunction. So, be very careful when doing this step.
#5: Shake off debris from the filter
Next, remove the clogged dirt and dust on the filter.
You can do this by gently tapping the filter to the edge of the dustbin.
To ensure more safety, follow this simple instruction:
- Use your dominant hand to hold the filter.
- Place your dominant hand on top of your other hand.
- Then, tap the wrist of your dominant arm to the back of your other hand.
That way, you’ll avoid getting the filter damaged.
Tip: When tapping the filter, do it very carefully and slowly. Doing this prevents the dust and dirt from going everywhere around the area.
“There’s stuck dirt on the filter. Can I wash it with water?”
No. Roomba filters are not designed to be washed with water. Or get in contact with any liquid.
Never clean the filter using warm water as this can:
- Damage the filter mesh.
- Create gaps between the filter and its case.
- Remove the important filtering components.
Instead, use a tweezer to remove the stuck debris on the filter. Or blow air directly into it.
Cleaning tip: For better performance, clean the filter once per week. Twice per week if you have pets at home.
Also, replace the filter every 2 months for continued efficiency.
When buying one, make sure to get one that’s iRobot-certified filter replacement. Plus, it must be applicable to your Roomba model.
#6: Briskly tap the bottom of the bin
After cleaning the filter, don’t forget to clean the device itself.
Sometimes, dirt and dust can get stuck inside the Roomba. And yes, it can potentially trigger Roomba Error 11 as well.
So, make sure to clean it as well.
One way you can do that is by tapping the bottom of the bin.
Here’s the more detailed instruction for that:
Note: Do this process on top of a trash bin.
- Hold your Roomba unit (without the dustbin) using one hand.
- Position your other hand on the bottom.
- Then, briskly tap the bottom of the Roomba using your other hand.
Doing this helps remove stuck dirt and dust inside the device.
You may also use an Air Duster to blow off the dirt. But make sure to control the pressure to avoid damaging the interior parts of the Roomba.
Continue doing this until you can’t see any more dirt inside the Roomba.
Use a flashlight to see the inside of its interior. So that you can completely clean the device.
#7: Reattach the filter to the dustbin
Done cleaning the filter and the inside of the Roomba? Then, prepare to reassemble your device.
First, reattach the Roomba filter to the dustbin.
Here’s how you can reinsert the filter to the dustbin based on the Roomba series:
- For 800 and 900 series: grab the top of the filter and put it back on its filter compartment.
- For s series: grab the tab at the middle of the filter and put it back on its filter compartment.
- For 600 and 700 series: grab the sides of the filter and attach it back to the inner-top of the dustbin.
- For e, i, and j series: grab the top and bottom of the filter and slide it back to the right side of the dustbin (facing the dustbin door).
Always be cautious when removing and reattaching the Roomba filter. Since it’s very fragile.
And any damage on it can significantly affect the performance of your Roomba vacuum.
After this, make sure to close either the dustbin or filter door. Whichever applies to your Roomba model.
#8: Secure the dustbin to the unit
Next, return the dustbin to the Roomba unit.
You can easily do this by placing the dustbin in the empty compartment on your Roomba unit.
Depending on the Roomba model you have, here’s how you should do it:
- For s series: place the dustbin at the empty compartment located at the very top-middle of the Roomba unit.
- For e, i, j, 600, 700, 800, and 900 series: place the dustbin at the empty compartment located at the side surface of the back of the Roomba unit.
Note: The dustbin is property placed to the Roomba once you hear a “click” sound. If you didn’t hear one, redo this specific step.
After this, the “Error 11” on your Roomba display should disappear. And you should be able to use your device again.
Press the “CLEAN” button on your Roomba to continue its cleaning session.
Or place it close to the Home Base. And use your iRobot Home app to command your Roomba to dock into it.
Want to learn how to clean the filter and bin on a Roomba 900 series?
Then, watch this short instructional video:
Learn more: Can you pick up and move a Roomba?
#9: Replace the dustbin
“Hey! My Roomba still displays Error 8. What should I do?”
If the troubleshooting process above didn’t work, then your Roomba dustbin must be faulty.
If that’s the case, you have no other choice but to replace the dustbin.
I know, it can be expensive…
But it will save you plenty of money, time, and effort.
You can bring your Roomba to an electronic technician. But you can’t always guarantee its success.
“Okay, sure. I’ll get a replacement. But where can I buy one?”
You can buy a Roomba dustbin replacement directly from iRobot or the Amazon Store.
Replacements are also available from iRobot authorized retailers.
Buying an iRobot-certified dustbin replacement is important to ensure product quality.
Plus, certified products offer warranties. Which may come in handy in the future. Making it a great investment.
Friendly reminder: Buying a dustbin replacement can be confusing. Since every Roomba series has a different dustbin design. So, make sure to ask for assistance from authorities or store retailers.
Is your Roomba device still under warranty? If yes, proceed to step #10.
#10: Contact iRobot customer care


“I don’t want to buy a dustbin replacement. Can I ask for a Roomba replacement instead?”
Sure. iRobot is always generous in giving replacement devices. As long as your device is under warranty. And it didn’t violate the warranty’s terms and conditions.
For once, opening the interior of the Roomba (e.g., gears) voids the warranty.
So, if you’re planning to claim a warranty, make sure not to disassembly your Roomba.
Before your request a replacement, prepare the following:
- Roomba device.
- Roomba’s serial number.
- Purchase receipt or invoice.
Prepare to answer the questions of the iRobot support personnel as well.
Before they grant your request, they may ask you to try other troubleshooting steps. So, be prepared to do that as well.
Make sure that your Roomba device is with you and has a charge.
You may also want to know: 10 Proven Tips To Make A Roomba Instantly Quieter